Every DIY enthusiast knows the frustration: you measure twice, cut once, and somehow the piece still doesn’t fit. Inaccurate measurements lead to wasted materials, delayed timelines, and mounting frustration that can turn an enjoyable weekend project into a headache. But what if the problem isn’t your measuring technique—it’s the surface you’re measuring against? A sanding combo, often overlooked as merely a finishing tool, plays a surprisingly critical role in achieving measurement precision. When surfaces are uneven, warped, or rough, even the best laser measuring tools and digital rulers can deliver misleading readings. By integrating proper surface preparation into your workflow, you create the ideal conditions for accurate, repeatable measurements. This article explores how a sanding combo works in tandem with precision measuring instruments to eliminate common errors, save time, and deliver professional-quality results in your DIY projects. Whether you’re building custom shelving or renovating a room, this integrated approach transforms how you work.
The Foundation: Precision Measuring in DIY Projects
Understanding Sanding Combo: More Than Just Surface Preparation
A sanding combo is a multi-tool system that combines different sanding grits, attachments, and sometimes orbital and belt sanding capabilities into a single versatile package. Rather than switching between separate tools for rough material removal and fine finishing, a sanding combo lets you progress through coarse, medium, and fine grits in one streamlined workflow. The system typically includes interchangeable pads or belts designed for different materials and applications—from aggressive stock removal on rough lumber to delicate finishing passes that create glass-smooth surfaces.

What most DIY enthusiasts miss is the direct connection between surface quality and measurement reliability. When you place a digital ruler against an edge that hasn’t been properly sanded, microscopic high spots and valleys create an inconsistent contact line, introducing errors that compound across multiple measurements. Similarly, a laser measuring tool aimed at a rough or textured surface scatters its beam, potentially adding millimeters of inaccuracy to your reading. A sanding combo eliminates these variables by producing uniformly flat, smooth reference surfaces. For woodworkers joining panels, renovators fitting trim against existing walls, or anyone who needs repeatable accuracy, the sanding combo transforms raw or degraded surfaces into reliable measurement planes. It’s not just about aesthetics—it’s about creating the geometric consistency that precision tools require to function at their full potential.
How Sanding Combo Enhances Precision Measuring
The synergy between a sanding combo and precision measuring tools operates on a simple principle: measurement accuracy depends entirely on the quality of contact between your instrument and the surface being measured. When you run a digital ruler along an edge that’s been properly prepared with progressive sanding grits, the tool maintains continuous contact across its entire length. Every point of the ruler touches the workpiece at the same plane, eliminating the micro-gaps that introduce cumulative error. For a 48-inch shelf that needs to fit between two walls, even 0.5mm of inconsistency per measurement point can result in a piece that’s visibly too long or frustratingly short.
Laser measuring tools benefit equally from sanded surfaces. A laser beam striking a rough or pitted wall disperses across the texture, causing the sensor to average between peaks and valleys rather than reading a true flat plane. After using a sanding combo to smooth the target area—even a small patch where the laser will strike—you get a clean, consistent reflection that translates to reliable distance readings. This becomes especially important when measuring for fitted installations like countertops, built-in bookcases, or door frames where tolerances are tight. The time invested in surface preparation with a sanding combo pays dividends by eliminating the need for test fits, repeated cuts, and frustrating adjustments that eat into your project timeline.
Key Benefits for DIY Enthusiasts
For the weekend woodworker or home renovator, integrating a sanding combo into the measurement workflow delivers three concrete advantages. First, enhanced accuracy—measurements taken against properly prepared surfaces consistently fall within tighter tolerances, meaning joints close cleanly and components align on the first attempt. Second, increased efficiency—by eliminating guesswork and reducing trial-and-error fitting, projects move faster from measuring to assembly. Third, reduced material waste—when your first cut is accurate, you stop burning through expensive hardwood or trim pieces trying to achieve the right fit. These benefits align directly with what DIY enthusiasts value most: tools and techniques that are straightforward to implement while delivering professional-level results without professional-level experience.
Step-by-Step Guide: Integrating Sanding Combo with Measuring Tools
Putting this approach into practice requires a deliberate workflow that treats surface preparation as an integral part of your measuring process rather than a separate finishing task. Start by identifying the surfaces that will serve as reference points or contact areas for your measuring instruments. These might be the edges of boards you’re joining, wall sections where you’ll aim a laser, or flat faces where a digital ruler needs to rest. Focus your sanding efforts on these critical zones first—you don’t need to finish an entire piece before taking measurements.
Begin with your sanding combo’s coarsest appropriate grit to remove obvious high spots, paint ridges, or material defects from your reference surfaces. Work systematically across the area, checking flatness with a straightedge as you progress. Once major irregularities are eliminated, switch to a medium grit to refine the surface geometry without introducing new scratches that could affect tool contact. Finish with a fine grit that produces a uniform plane—this is where your digital ruler will achieve full-length contact and your laser will get a clean return signal. Before measuring, wipe the surface free of dust, as sanding residue can create a false layer between your tool and the true surface. Position your laser measuring tool so it strikes the prepared patch squarely, avoiding angles that might catch remaining texture at the edges of your sanded area. When using a digital ruler, press it gently against the prepared edge and confirm it sits flat along its entire length before recording your reading. After taking initial measurements, verify by measuring from a second reference point or reversing your tool’s orientation. If readings differ, revisit the surface preparation at the point of inconsistency. For ongoing projects, maintain your sanded reference surfaces by storing workpieces face-down on clean, flat supports and re-sanding lightly before critical measurements if the piece has been exposed to humidity or handling.
Common Pitfalls and How to Avoid Them
The most frequent mistake is assuming a surface looks flat enough without verifying it against a straightedge after sanding. Visual inspection misses subtle warping that measuring tools will detect as inconsistency. Another common error is sanding with too much pressure in one area, creating a concave spot that throws off readings. Use even, overlapping passes and let the sanding combo’s weight do the work. Finally, many DIYers skip re-preparation between project phases—a board that was flat yesterday may have absorbed moisture overnight and developed a slight bow. A quick pass with fine grit before critical measurements catches these changes before they become costly cutting errors.
Real-World Application: Integrated Tool Systems and Precision
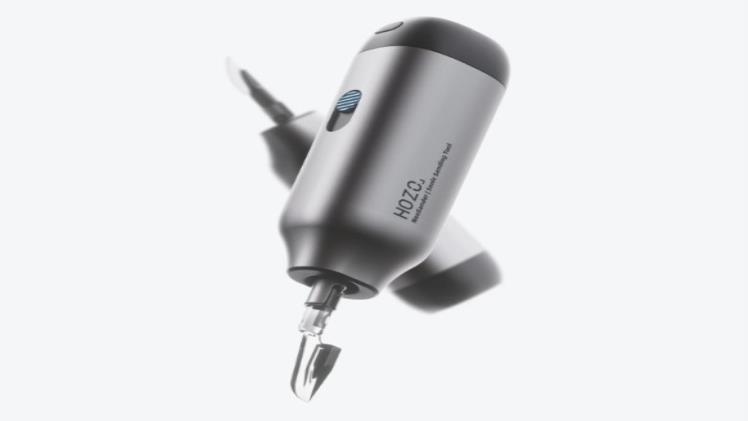
The design philosophy behind manufacturers like HOZO exemplifies how thoughtful tool integration can elevate DIY results from acceptable to exceptional. Their tools are engineered with the understanding that precision isn’t achieved through a single instrument working in isolation—it emerges from a system where each component supports the others. This approach to tool design emphasizes intuitive interfaces, ergonomic handling, and compatibility across workflows, making it natural for users to combine surface preparation with measurement tasks without disrupting their project momentum.
Consider a practical scenario: a DIY enthusiast is building a floating desk that must fit precisely into an alcove with slightly irregular walls. Using a sanding combo to prepare both the wall contact points and the desk edges creates true reference planes. Then, with a laser measuring tool aimed at the smoothed wall patches, the exact alcove dimensions emerge with confidence-inspiring consistency. A digital ruler confirms the desk edge dimensions against those readings, and because both surfaces have been properly prepared, the numbers match reality. This integrated workflow—where surface preparation feeds directly into measurement accuracy—reflects how modern tool ecosystems are designed to work together rather than as standalone solutions. For DIY enthusiasts who value efficiency, this means fewer trips back to the workshop, less second-guessing, and projects that come together with a satisfying precision that builds confidence for increasingly ambitious builds.
Building Precision Into Every DIY Project
The connection between surface preparation and measurement accuracy is one of those insights that seems obvious in hindsight yet transforms how you approach every project once you internalize it. A sanding combo does far more than make wood look pretty—it creates the geometrically consistent surfaces that your laser measuring tools and digital rulers need to deliver their full potential. By preparing reference surfaces before measuring, you eliminate the hidden variables that cause joints to gap, shelves to bind, and trim to misalign despite your best efforts with quality instruments.
For DIY enthusiasts seeking professional results without years of trade experience, this integrated workflow offers a practical path forward. You gain tighter tolerances on first attempts, spend less time on frustrating test fits, and waste fewer materials on cuts that miss the mark. The approach is straightforward to implement—identify your measurement contact points, prepare them with progressive grits, and then trust your tools to give you accurate readings. Start with your next small project: sand your reference edges before measuring, and notice how much cleaner everything comes together. As you build confidence with this method, you’ll find yourself tackling more ambitious builds knowing that your measurements reflect reality, not surface imperfections. Explore tools designed to work as integrated systems, and let precision become a habit rather than a hope.