 Starmusiq Tamil Mp3 Songs Free Download
Imagine standing at the edge of a misty mountain ridge, the sunrise painting the sky in shades of amber and violet. You raise your camera, hold your breath, and press the shutter — only to review a blurry, unusable image ruined by the subtle tremor of your hands after a long climb. It’s a frustration every adventure traveler knows too well, and it often comes down to one overlooked piece of gear: the tripod. But here’s the dilemma. Do you carry a full-size hiking tripod that promises rock-solid stability, or do you toss a mini tripod into your pocket and trade some performance for freedom of movement? The answer isn’t one-size-fits-all, and getting it wrong means either lugging unnecessary weight up a trail or struggling with a setup that can’t handle the shot you need. This guide breaks down the real differences between hiking tripods and mini tripods, comparing their features, strengths, and limitations so you can make a confident choice. Whether you’re chasing golden-hour landscapes or snapping quick clips in a bustling market, the right tripod transforms your travel photography from frustrating to effortless.
Understanding the Basics: Hiking Tripod vs. Mini Tripod
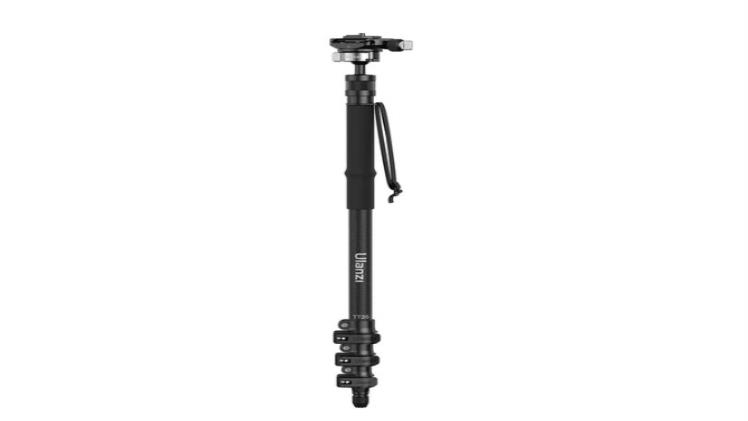
A hiking tripod is designed specifically for outdoor photographers who need stability without being weighed down on the trail. These tripods typically feature carbon fiber or lightweight aluminum construction, extend to full standing height, and fold down to a compact size that straps easily to a backpack. They’re built to handle uneven terrain, wind, and the demands of long-exposure landscape photography where even the slightest vibration ruins a shot. Most weigh between one and three pounds and can support mirrorless cameras or lightweight DSLRs with ease.
A mini tripod, by contrast, is a pocket-sized support system that usually stands no taller than eight to twelve inches. Often called tabletop tripods, these compact tools are designed for quick deployment on flat surfaces — a rock ledge, a café table, a park bench. They shine in urban travel, vlogging setups, and group selfies where you need hands-free shooting without the bulk of a full-size rig. Many mini tripods double as handheld grips, making them versatile companions for content creators on the move.
Both options align with the travel-light philosophy that defines modern adventure photography. The hiking tripod prioritizes performance in demanding environments, while the mini tripod embraces minimalism and spontaneity. Understanding where each excels — and where each falls short — is the first step toward choosing the right tool for your shooting style.
Key Features to Evaluate for Adventure Photography
When comparing tripods for travel, the decision ultimately comes down to a handful of critical features that directly affect your shooting experience. Stability is the most obvious consideration — a hiking tripod with fully extended legs and a center column provides a solid platform even on loose gravel or windswept ridgelines, while a mini tripod relies on whatever surface you can find and offers less resistance to vibration. That said, portability cuts the other direction. A mini tripod that slips into a jacket pocket or clips to a belt loop means you’ll actually carry it, whereas a hiking tripod strapped to the outside of your pack might stay there when fatigue sets in.
Weight and packed size matter more than most photographers admit before their first multi-day trek. A carbon fiber hiking tripod shaves meaningful ounces compared to aluminum and resists corrosion from rain and saltwater, though aluminum models remain a durable and budget-friendly alternative. Mini tripods, often constructed from reinforced polymer or aluminum alloy, rarely exceed half a pound, making weight a non-issue. Maximum height determines whether you can shoot comfortably at eye level or need to crouch, and load capacity dictates whether your camera-and-lens combination is safely supported. Overlooking either spec leads to awkward compositions or, worse, a toppled camera.
Accessory compatibility rounds out the evaluation. A tripod head that accepts Arca-Swiss-style quick-release plates streamlines your workflow, and brands like Ulanzi offer lightweight accessories designed to pair seamlessly with compact travel setups. The right combination of tripod and accessories turns a basic support into a versatile creative tool.
The Importance of a 360° Panoramic Ball Head
A 360° panoramic ball head is one of the most impactful upgrades you can add to either tripod type. Unlike fixed or pan-only heads, a ball head lets you tilt, swivel, and rotate your camera in a single fluid motion, then lock it precisely where you want. For adventure travelers, this means quickly recomposing from a horizontal landscape to a vertical waterfall shot without fumbling with multiple adjustment knobs. It’s especially valuable when capturing wide panoramic sequences — the smooth, graduated rotation ensures consistent overlap between frames, which stitching software needs to produce seamless results. Even on a mini tripod perched on a rock, a quality ball head gives you the creative freedom to nail dynamic angles that a fixed mount simply can’t deliver, turning a modest setup into a surprisingly capable one.
Addressing the Needs of Adventure Travelers
Adventure travelers occupy a unique space in the photography world. Unlike studio shooters or even casual tourists, they face physical demands that directly compete with their creative ambitions. Every ounce in a pack matters when you’re ascending switchbacks at altitude, yet the whole point of carrying a camera is to capture images that do justice to extraordinary places. This tension between physical comfort and photographic capability is where tripod selection becomes deeply personal.
For those tackling multi-day backcountry routes, a hiking tripod solves problems that no amount of image stabilization can fix. Long exposures of star trails above an alpine lake, silky waterfall shots in a forested canyon, or sharp telephoto images of distant wildlife all demand a stable platform at a usable height. The reliability of planting three legs on uneven ground and knowing your camera won’t drift mid-exposure is worth the extra weight for photographers who plan their shots around golden hour or blue hour conditions. Many hiking tripods also feature spiked feet or removable rubber caps, letting you anchor into soft soil or wedge between rocks — details that matter when the terrain refuses to cooperate.
Mini tripods answer a different set of frustrations. When you’re moving through airports, navigating crowded streets, or hopping between transportation modes, the last thing you want is gear that slows you down or draws unwanted attention. A mini tripod deploys in seconds, works beautifully for time-lapse clips from a hotel balcony, and doubles as a stabilizing grip for handheld video. For travelers who prioritize spontaneity over planned compositions, this quick-draw convenience eliminates the friction that often keeps a full tripod buried in a bag. The key is honestly assessing whether your shooting style demands sustained stability or rewards fast, flexible setups — because the best tripod is ultimately the one you’ll actually use when the moment arrives.
Comparative Analysis: Pros and Cons for On-the-Go Shots
Hiking tripods bring undeniable advantages when conditions get challenging. Their full-height extension lets you compose at eye level without crouching or stacking rocks, and their wider leg stance creates a stable base that resists gusts and vibrations during long exposures. They handle heavier camera-and-lens combinations confidently, and spiked or rubberized feet adapt to surfaces ranging from mud to slickrock. The trade-off is bulk — even the most compact hiking tripod adds noticeable length to your pack and requires deliberate setup time. On fast-paced travel days or in tight spaces, that extra size becomes a liability rather than an asset.
Mini tripods counter with near-invisible portability and instant readiness. They slip into daypacks, cargo pockets, or sling bags without restructuring your packing strategy, and they deploy in seconds when an unexpected moment unfolds. Their low profile makes them discreet in museums, cafés, and street photography scenarios where a full tripod attracts attention or violates venue rules. However, their limited height restricts compositions to whatever elevated surface you can find, and lightweight construction means they struggle to hold steady in windy conditions or with heavier gear. A hiking trip above treeline exposes these limitations quickly, while a week-long city tour rarely does. Matching the tripod to the dominant environment of your trip — rugged wilderness versus urban exploration — eliminates most regret before it starts.
Practical Solutions: Step-by-Step Guide to Choosing Your Tripod
Selecting the right tripod doesn’t require guesswork if you approach the decision methodically. Start by honestly assessing your travel style and photography goals. Ask yourself how often you’ll actually set up a tripod during a typical trip. If you’re the type who wakes before dawn to chase golden-hour landscapes and spends time composing long exposures, a hiking tripod earns its place in your pack. If you’re more likely to grab quick handheld shots throughout the day and occasionally want a stable platform for a group photo or short time-lapse, a mini tripod covers those needs without the commitment. Consider the types of shots that matter most to you — night sky photography and flowing water demand sustained stability, while street scenes and travel vlogs reward speed and discretion.
Next, evaluate the practical constraints that shape your gear choices. Set a realistic weight tolerance by packing your bag with everything else you plan to carry, then decide how many additional ounces or pounds you’re willing to add. Budget plays a role too — carbon fiber hiking tripods cost more than aluminum alternatives, and premium mini tripods with metal construction outperform cheap plastic models significantly. Check accessory compatibility before you buy. A tripod that accepts Arca-Swiss quick-release plates integrates smoothly with most camera setups, and pairing it with purpose-built accessories from brands like Ulanzi can extend functionality without adding unnecessary bulk. A compact ball head, a smartphone adapter, or a small LED light panel can transform a simple tripod into a complete content creation kit.
Once you’ve narrowed your options, test both tripod types against real scenarios before committing. Set up a hiking tripod in your living room and practice extending, leveling, and collapsing it until the process feels automatic — if it takes more than thirty seconds, you’ll skip it on the trail. Take a mini tripod to a local park and try composing shots at different heights to understand its limitations firsthand. Place your actual camera on it and check whether the load capacity holds steady or whether the setup feels top-heavy and precarious. Finally, make your decision based on which needs you’ve ranked highest. If stability and image quality in demanding environments top your list, the hiking tripod wins. If convenience, packability, and everyday versatility matter more, the mini tripod is your answer. Some travelers ultimately carry both — a hiking tripod for planned photography days and a mini tripod tucked into a daypack for everything else — and that hybrid approach eliminates compromise entirely.
Match Your Tripod to Your Adventure Style
The choice between a hiking tripod and a mini tripod comes down to how you travel and what you expect from your photography. Hiking tripods deliver the stability that long exposures, night sky captures, and telephoto compositions demand — they’re purpose-built for rugged terrain and uncompromising image quality when conditions are tough. Mini tripods trade that rock-solid performance for effortless portability, instant deployment, and a low profile that fits seamlessly into urban exploration, vlogging, and spontaneous travel moments. Neither option is universally superior; each serves a distinct set of priorities. If your trips revolve around wilderness photography and planned golden-hour sessions, invest in a quality hiking tripod that can handle the environment. If you value traveling light and capturing content quickly across varied settings, a mini tripod paired with a versatile ball head and compatible accessories will serve you well. Use the step-by-step framework in this guide to honestly evaluate your shooting habits, weight tolerance, and creative goals. When your tripod matches your adventure style, you stop missing shots and start making them — every time the light cooperates.
